Connecting an active subwoofer properly is essential for achieving optimal audio performance. A subwoofer enhances the low-frequency range in your audio system, adding depth and impact to music, movies, and gaming experiences. While connecting a subwoofer may seem straightforward, improper connections can lead to poor sound quality, distorted bass, or integration issues with your main speakers.
An active subwoofer, unlike passive models, contains a built-in amplifier, which simplifies setup and ensures that the subwoofer receives the correct power for consistent performance. Understanding how to connect your active subwoofer correctly, considering placement, cabling, and calibration, is key to unlocking the full potential of your audio system. This guide provides a detailed, step-by-step approach to connecting an active subwoofer in both stereo and home theater setups, including wireless configurations where applicable.
1. Understanding Active Subwoofers
What Is an Active Subwoofer?
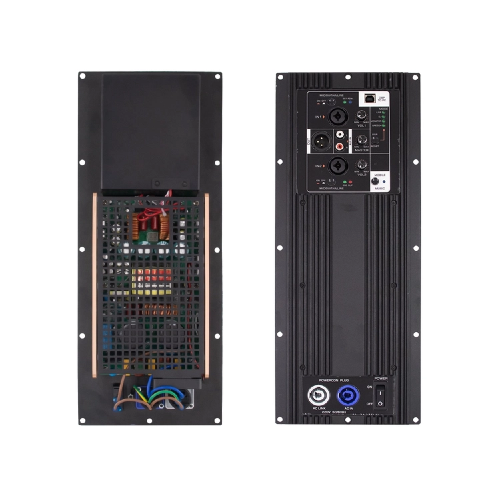
An active subwoofer is a self-powered speaker that incorporates its own amplifier within the enclosure. This built-in amplifier is carefully matched to the subwoofer driver, ensuring that it delivers accurate and controlled low-frequency reproduction. Unlike passive subwoofers, which require an external amplifier, active subwoofers are designed for plug-and-play convenience while maintaining superior bass performance.
Key Components
Built-in Amplifier: Provides dedicated power for the subwoofer driver, eliminating the need for external amplification.
Crossover Control: Allows you to set the frequency range at which the subwoofer operates, ensuring smooth integration with your main speakers.
Phase Control: Aligns the subwoofer’s output with the rest of the audio system to prevent phase cancellation.
Enclosure Type: Ported or sealed enclosures determine the bass characteristics, with ported designs delivering deeper, more resonant low frequencies and sealed designs producing tighter, more controlled bass.
Advantages of Active Subwoofers
Simplified installation and setup
Optimized and consistent performance
Reduced signal loss and distortion
Fine-tuning options for crossover, phase, and volume
Built-in protection features to prevent damage
2. Required Tools and Equipment
Before connecting an active subwoofer, gather the necessary tools and equipment to ensure a smooth installation process.
Audio Cables: RCA cables, LFE cables, or speaker wires (depending on the connection type)
Power Supply and Surge Protection: Protects your subwoofer and audio system from electrical surges
Audio Receiver or Preamp: Required for home theater setups or high-end stereo systems
Optional Accessories: Cable management tools, level meters, or room calibration microphones
Having all tools ready ensures a seamless connection process and prevents interruptions during setup.
3. Placement Considerations
Ideal Subwoofer Positioning
Proper placement of an active subwoofer affects bass clarity and overall system performance. Generally, subwoofers are best positioned near walls or corners, as these locations naturally reinforce low-frequency output. However, placing a subwoofer too close to a corner may result in boomy or exaggerated bass.
Distance from Walls
Leave a small distance between the subwoofer and walls to prevent reflections that can muddy the sound. Adjusting placement slightly can have a significant impact on bass response, especially in small to medium-sized rooms.
Room Acoustics
Consider room shape, furniture, and materials. Carpeted floors and soft furnishings absorb sound, which can slightly reduce bass intensity, while hard surfaces can reflect bass, causing peaks and uneven response. Fine-tuning placement based on your room acoustics is essential for optimal integration.
4. Connecting an Active Subwoofer to a Stereo System
Step-by-Step Guide
Power Off Your System: Always turn off your amplifier or receiver before connecting the subwoofer.
Identify the Subwoofer Input: Most active subwoofers have RCA or LFE input jacks.
Use the Correct Cable: Connect the subwoofer output from your stereo receiver to the subwoofer’s input using an RCA cable.
Adjust the Crossover: Set the crossover frequency to match the lowest frequency your main speakers can comfortably handle, usually between 80–120 Hz.
Set Phase Control: Adjust the phase switch (0° or 180°) to align the subwoofer output with your main speakers, reducing phase cancellation.
Power On and Test: Turn on the subwoofer and your stereo system. Play a test track with deep bass and adjust volume for balanced output.
5. Connecting an Active Subwoofer to a Home Theater System
Identifying the Subwoofer Output
Most AV receivers have a dedicated subwoofer (LFE) output. This output is optimized for low-frequency signals and ensures the subwoofer receives the correct frequencies for home theater applications.
Using LFE Connection
Connect a single RCA cable from the LFE output on your AV receiver to the LFE input on your active subwoofer.
Ensure the receiver’s bass management settings are configured to “Subwoofer” or “LFE.”
Speaker-Level Connections
Some active subwoofers support speaker-level inputs. Connect the left and right speaker outputs from your receiver or amplifier to the subwoofer’s speaker-level inputs. This is less common but useful in systems without dedicated subwoofer outputs.
Calibration Tips
Start with volume at a moderate level
Play a test tone or bass-heavy scene
Adjust crossover and phase settings until bass blends seamlessly with other speakers
6. Wireless Active Subwoofer Connections (If Applicable)
Pairing Process
Wireless active subwoofers use built-in transmitters and receivers to communicate with the main system. To pair:
Power on the subwoofer and the main transmitter
Activate pairing mode on both devices
Wait for indicator lights to confirm a successful connection
Interference and Range Considerations
Ensure there are minimal obstacles between the transmitter and subwoofer. Wireless subwoofers may be susceptible to interference from Wi-Fi networks, Bluetooth devices, or other electronics.
Synchronization
Adjust phase and volume to match your main speakers. Wireless systems sometimes introduce minor latency, so fine-tuning ensures tight integration with your audio system.
7. Testing and Fine-Tuning Your Subwoofer
Listening Tests
Use music, movies, or test tones to evaluate bass quality. Listen for clarity, impact, and integration with the main speakers.
Adjusting Controls
Crossover Frequency: Ensures a smooth transition between subwoofer and main speakers
Phase: Aligns low-frequency output to prevent cancellations
Volume: Balance the subwoofer level with the rest of the system
Common Mistakes to Avoid
Overdriving the subwoofer, causing distortion
Incorrect phase settings leading to weak or canceled bass
Ignoring room acoustics, which can significantly affect performance
8. Troubleshooting Common Issues
Subwoofer Not Producing Sound
Check power connections and ensure the subwoofer is turned on
Verify cables are properly connected to the correct inputs
Check receiver settings to ensure subwoofer output is enabled
Distorted or Boomy Bass
Lower subwoofer volume
Adjust crossover frequency
Reposition the subwoofer for better room integration
Connection and Power Issues
Inspect cables for damage
Ensure the outlet provides sufficient power and is properly grounded
Confirm any wireless subwoofer pairing is successful
9. Summary Table: Connection Methods
Connection Type | Steps | Notes |
RCA/LFE (Stereo/Home) | Connect the subwoofer input to the receiver’s dedicated RCA or LFE output using a high-quality cable. Ensure the receiver’s bass management settings are enabled to direct low-frequency signals to the subwoofer. | This is the most common and straightforward method for both stereo and home theater systems, providing clear, distortion-free bass without requiring additional wiring. |
Speaker-Level Input | Connect the left and right speaker outputs from your amplifier or receiver to the subwoofer’s speaker-level inputs. Adjust the subwoofer volume and crossover settings to match the main speakers. | Used when no dedicated subwoofer output exists on the system. It allows the subwoofer to receive full-range signals, but careful calibration is required to avoid overpowering the main speakers. |
Wireless | Pair the subwoofer with the transmitter or wireless hub according to the manufacturer’s instructions. Adjust phase, volume, and crossover settings for proper integration. | Avoid obstacles, interference, or large distances between the transmitter and subwoofer for optimal performance. Wireless connections offer convenience but may require fine-tuning for tight bass integration. |
This table summarizes the main methods of connecting an active subwoofer, helping users choose the best approach for their setup while ensuring balanced, immersive bass and easy system integration.
10. Conclusion
Properly connecting an active subwoofer is essential for achieving deep, immersive, and high-quality bass in any audio setup. Whether you are setting up a stereo system, a home theater, or a wireless audio configuration, understanding the correct placement, connection methods, and calibration techniques ensures optimal performance and a seamless listening experience. Following the recommended steps allows your subwoofer to integrate perfectly with your main speakers, delivering balanced bass that enhances music, movies, and gaming alike.
For those seeking high-quality, reliable active subwoofers, Dongguan Lihui Technology Co., Ltd. offers advanced solutions designed to meet the needs of both home and professional audio systems. Their products feature built-in amplifiers, adjustable crossovers, phase controls, and durable enclosures, providing precise low-frequency reproduction and effortless integration. Whether you need guidance on selecting the right subwoofer or require technical support for installation, contacting their team ensures you receive expert advice and recommendations tailored to your audio setup. Exploring their offerings can help you achieve the perfect blend of power, clarity, and performance in your sound system.
11. FAQ
Q1: Can I connect an active subwoofer directly to a speaker output?
A: Only if the subwoofer supports speaker-level input. Otherwise, use RCA or LFE inputs.
Q2: Do I need a special cable to connect an active subwoofer?
A: Standard RCA or LFE cables are sufficient; speaker-level cables may be required in some cases.
Q3: What is the difference between LFE and line-level connection?
A: LFE is a dedicated low-frequency channel from an AV receiver, while line-level (RCA) can carry full-range audio depending on the system.
Q4: Can an active subwoofer work wirelessly with any audio system?
A: Not all systems support wireless subwoofers; ensure compatibility before purchase.
Q5: How do I know if the subwoofer is correctly integrated with my main speakers?
A: Proper integration is achieved when bass sounds balanced, seamless, and free from phase cancellation or distortion.


 +86-18822957988
  rick@lihuitech.com
  +86-13925512558
  Hengbang Technology Park Lihui Technology Co., Ltd., No. 8 Weiheng Road, Niushan Industrial Zone, Dongguan City